Currently I am reading 100 Go Mistakes
and I like it. One of my personal pet peeves is the ‘interface on the producer side’. It’s a sure way to spot a programmer who is new to Go. And that makes me think again on how to mentor new Go programmers. I remember myself struggling with that when starting out. Today most of the idiomatic Go is widely documented and newbies still struggle with that.
Should the language itself enforce these ‘mistakes’? Some can be enforced by linters but not all. And even with the ‘interface on the producer side’ mistake there are exceptions where it could make sense to share an interface between consumers and maybe even put it on the producer side. That’s the ‘art’ of the craft. I got asked once by a developer coming from .NET: “Why are these idiomatic rules not written down somewhere?”. I guess because it’s kind of an oral tradition. Similar to the (horribly named) ‘code smells’. It’s a taste imprinted by practice and reading lots of ‘good’ Go code.
When working with AI I try to provide unit tests and interfaces before I let it generate the actual function. I saw too much one-shot code that was not testable and horribly un-idiomatic. The interface and the unit test act as the spec and help me get what I want out of the LLM. I still care about code quality so that might just be me.
I can’t grok a YAML that is longer than it is wide.
Also vice-versa.
Tippy Taps or just Tap
Why does your format make me press shift-tab key so often? That’s way too many chorded taps.
Lists are not listening
Finally a list. Do we indent or don’t we? The equivalent to inserting a USB-A stick. Oh no, why does it look that way?
Looks are everything
Let’s not fool ourselves.
Is it sinful to yaml?
P1: God is in the details.
P2: All details are made by humans.
P3: YAML is made by humans.
P4: Any Gods except the one true God are demonic.
C: Somewhere in this YAML file here is a bezelbub to be found.
Why won’t it stop
We dug too deep and too greedily in the mines of go-k8s and now for the next 25 years we will have the to pay the price.
What then?
hedge knights sleep under the stars
I propose hedge:
# COMPONENT DEFINITION
Component   Deployment
Name        nginx-layout
Zone        production

# LAYOUT & SCALING
Replicas    3
Strategy    RollingUpdate

# VISUALS (METADATA)
Labels
    App     nginx
    Tier    frontend

# CONTENT (CONTAINERS)
# The schema knows 'Container' starts a list item
Container   nginx-main
    Image   nginx:1.21
    Port    80
    CPU     500m

Container   sidecar-logger
    Image   fluentd
    Role    logging
This is one of my favorite and underrated patterns in Go.
Let’s assume a format based on Lua tables, let’s just call it LTRN (Lua Table Resource Notation) and I was imagining a mock value generator for that format.
Now is the perfect time to use a struct of function types!
Imagine we have a simple spec for a property in our imaginary resource:
The generator would be a concrete struct that contains functions that we can swap as we like. We need a seam to insert our mock data during testing. Injecting a struct of functions makes this code easily testable.
Why, oh why, is this not an interface, I hear you ask?
My argument here is that fill is an un-exported function. It won’t be used by 3rd party developers.
This is very flexible for low state structs that you want to heavily test. Ideally it would not have any fields at all. (Please don’t store your db connection in the generator!)
Back to my argument: The advantage of using a struct over an interface. When we implement the interface for a test mock we have to implement every single function even though we might only need one of them for the particular test. For large interfaces, this sucks! Add that to the reasons why large interfaces are generally discouraged and not idiomatic Go.
With a struct with function types we can provide only the functions that we actually need. To be honest, function types are reference types. But for our purpose we can think of them as pointers. They can be nil! This saves us from writing a lot of unnecessary code in our tests. (don’t forget to check you nils or you might run into panic)
I have been thinking about time again. More in terms of programming practices and less as in technical scheduling. This is just a point I try to remember when working on scheduling related problems. That being said: engineering reality often forces you make tradeoffs of course.
Moments slip by
In logical time we are starting from identity: We can tell points in time (also called moments) apart from another by them being distinct. M1 has an unique identity and M2 has an unique identity. These moments are different from each other. This ontology is not just philosophically relevant but gives us great power to create machines to perform work at certain moments. I would argue that logical moments are also persistent in state. A crontab file is not going to change unless you change it. Logical time is always discrete but two moments might have a relationship to each other.
Chronological time is a lot more analog, dynamic and “fuzzy”. A moment in chronological time is an observation of a stream. A sample if you will of a continuous function. The stream is continuous but the observer is discrete.
I should remember: A lot of problems arise when dealing with chronological time from logical time and vice versa.
Category error: Time as approximated state
Time in a sequential procedure is a most always the worst indicator for a state change.
put pasta water on stove -> wait 5 minutes -> put in pasta
Obviously the pasta water might not be boiling after 5 minutes(stove might be turned too low or even off). The correct way would be to verify the state by looking at data or features. The water is bubbling and steaming? Or a thermometer shows actual degrees? We often combine time and state checking in polling to wait and check. But a blind timer is almost always the wrong answer. Timeouts are a special term for blind timers. State relations triggered by timeouts depend on chronological time and can be helpful as a last resort. But think about this: Would you add a “just-in-case” clause to a while loop just because you are afraid about it not terminating?
Don’t use time as a scapegoat for unsharp thinking or being lazy:
If the e2e test runs more than 5 minutes it might be safe to assume “something” has timed out and therefor we can time out the whole test? No, I should at least make sure that the systems and environment is handled.
Working with the CLI is still one of the main modes of computation for me. My approach to scripts and tools on the command line has changed. Instead of writing complex ‘god’ shell scripts that try to cover all edge cases, I began to write a lot simpler scripts. Yes, they might not work in all situations, but reading and maintaining them is a lot easier for me.
Since working with Go is so comfortable to write, I started to write more and more CLI tools in it. I collect those tools in my belt repository on codeberg
.
I appreciate a lot of what Golang is doing, and some CLI tools are just thin CLI’s around a Go function. But Go is great for some more complex tools. Charm
makes excellent libraries that I often use. Cobra
is very useful when a tool grows to have more rich CLI options.
When writing a Go tool I still practice the approach that less code is better. I start with just a main.go and as the tool evolves I slowly refactor it into Cobra cmds or different files.
I also make extensive use of code agents to write and rewrite. Nonetheless, I like to think there is still a human touch in these tools. If anything, this is a great way to learn and improve.
I usually try my idea for a new tool and put it in my labs repo on codeberg
. It then might graduate to belt if I use it for a while, and I get the impression of it being kind of well-rounded.
I can only recommend anyone to also create their own set of tools like this. It feels great to be able to add features when needed and there is a subjective boost to my capacity not only on the terminal but to my computing in general.
This blog posts discusses two common techniques when working with objects in Lua for games especially when working with Pico8
.
The Concatenation Trick
2D movement on a grid is so common in games that I use this trick all the time. It’s easy to implement and and easy to use.
Let’s look at an example. Create a new object in a cell at (i,j) in myArray with the following code:
myArray[i..","..j] = {}
This makes it incredibly easy to retrieve an object at a certain cell. Want to know if there is an item laying on the floor on the map tile in x/y? Just check if the coordinates! local item = myArray[i..","..j] and then if item then pickup(item).
To iterate over all objects in myArray you can use the pairs iterator. Caution: the objects are not ordered when using pairs!
for k,v in pairs(myArray) do-- v is the cell object-- k is a string in the form of "i,j"end
If we want to access the objects in a particular order we should use nested for loops:
for i=1, 8dofor j=1, 8dolocal cell = myArray[i..","..j]
-- do stuff with the cellendend
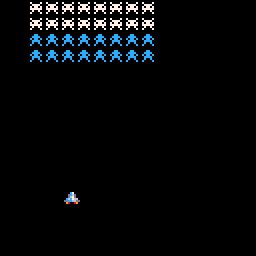
Objects And Container
Entities like the spaceship in this GIF are objects. Containers for objects are special in Pico-8 because we have a couple of built-in functions to help us manage insertion and deletion. I strongly propose to use add(), del() and all() for container and entity management.
Create and add an object to a table with add():
local entities = {}
local player = {
x =3,
y =3,
sprite =5}
add(entities, player)
In your _update or _draw callbacks, you will most likely want to loop over all objects. You should use all() for that:
for entity in all(entities) do-- do stuff hereend
You can use del() to remove an object from the container even while iterating over the container:
for entity in all(entities) do
	del(entities, entity)
end
This only works with all() and del()! This is great for games where you have objects such as bullets, effects or timed events that are added and removed dynamically.
I hope that these two hints help you to get started with objects and tables for games. For advanced users, other methods might be more efficient. I recommend reading the Pico-8 Docs or PIL
for more information.
I thought it might be interesting to implement a small register based Virtual Machine in Lua. Let’s start by considering the architecture of a register machine.
The “machine”
If we look at how existing Register Machines are designed for example the Lua VM itself, we see a few things:
registers
a program
something that executes the program
The last part will be the point of entry for the Lua program itself. This might seem unimportant but it will help us shape the core features of the design.
The memory
Let’s start by asking: How are our values stored in memory?
A typical approach is to use a counter to fetch the program from a certain cell in memory. This counter is sometimes called the program counter or short PC. In Lua we can represent the memory as a flat table and the PC as a number type.
local MEM = {}
local PC =0
The registers
A data registers is a small storage cell defined by its name (address), wordlength and content. In other machines such as the DCPU-16
, for example, there are 8 registers named A,B,C… and correspond to the values 0x00-0x07 with a word length of 16bit.
We can use a Lua table and init the fields to numbers that represent our registers:
local registers = {
A =0,
B =0,
C =0,
D =0}
Now we can use the registers table to access each register by simple dot syntax: register.A.
Opcodes and operands
Instructions might be represented as byte sequences in the memory and can be instruction like NOP. NOP is the no operation and does nothing to the state of the registers. It could be an operand that is meaningful in conjunction with a opcode like MOV A, c (move constant c into the register A).
We represent instructions as Lua functions in a table where the keys represent the bytecode of the opcode:
local opcodes = {
["0x00"] =function() -- NOPend,
}
Fetch and Execute
We need to establish a cycle to read out the instruction and fetch the opcode.
The first step is easy. We offset our instruction register:
PC = PC +1
Then read out the current instruction at the location of the program counter into our instruction register:
local IR = MEM[PC]
Since our opcodes are stored in a table where the opcodes are keys we can decode the opcode by addressing the table and then executing it:
opcodes[IR]()
We need to check if the PC has reached the end of the program memory:
local FDX =function()
while PC <#MEM do PC = PC +1local IR = MEM[PC]
opcodes[IR]()
endend
To get better insight in our little cpu we add a couple of print statements:
local FDX =function()
print("PC", "IR")
while PC <#MEM do PC = PC +1local IR = MEM[PC]
opcodes[IR]()
print(PC, IR)
endend
Let’s test the program! You can fill the memory with a program and execute the FDX function:
-- TESTMEM = {
"0x00",
"0x00",
"0x00"}
FDX()
The output should be similar to: PC IR 1 0x00 2 0x00 3 0x00
Great! Now our machine finally does… nothing.
Fetch operands
In order for our machine to do something a little more meaningful we need to implement operands. Let’s introduce a fetch function into our program:
local fetch =function()
PC = PC +1return MEM[PC]
end
We can change the FDX function to use the fetch function and print out the A register:
local FDX =function()
print("PC", "IR", "A")
while PC <#MEM dolocal IR = fetch()
opcodes[IR]()
print(PC, IR, registers.A)
endend
We define this somewhere above the opcodes because we will need to use it to get the operands.
Let’s create a helper conversion table that translates bytecode to operands:
We now add the MOV R, c instruction to the opcodes table:
local opcodes = {
["0x00"] =function() -- NOPend,
["0x01"] =function() -- MOV R, clocal R = operands[fetch()]
local c = fetch()
registers[R] = tonumber(c)
end}
We change our testprogram to: MEM = { “0x00”, “0x01”, “0x00”, “0x01” “0x00” }
Our output then tells us that our A register is being filled with 1.
PC  IR      A
1   0x00    0
4   0x01    0x01
5   0x00    0x01
JMP around
To show how to extend this, I added three more instructions: ADD, SUB, JMP and IFE. JMP sets the program counter to a specific address. IFE adds 3 to the PC if two registers are equal.
local opcodes = {
["0x00"] =function() -- NOPend,
["0x01"] =function() -- MOV R, clocal A = operands[fetch()]
local c = fetch()
registers[A] = tonumber(c)
end,
["0x02"] =function() -- ADD R, rlocal R = operands[fetch()]
local r = operands[fetch()]
registers[R] = registers[R] + registers[r]
end,
["0x03"] =function() -- SUB R, rlocal R = operands[fetch()]
local r = operands[fetch()]
registers[R] = registers[R] - registers[r]
end,
["0x04"] =function() -- JMP addrlocal addr = fetch()
PC = tonumber(addr)
end,
["0x05"] =function() -- IFE R, rlocal R = registers[operands[fetch()]]
local r = registers[operands[fetch()]]
PC = (R == r) and PC +3or PC
end}
-- TEST machineMEM = {
"0x00", -- NOP"0x01", "0x01", "0x05", -- MOV B, 5"0x01", "0x02", "0x01", -- MOV C, 1"0x02", "0x00", "0x02", -- ADD A, C"0x05", "0x00", "0x01", -- IFE A, B"0x04", "0x7", -- JMP 1"0x00",
"0x00"}
Now we have a small loop that counts to 5 and then stops! Yeah!
There is a lot of room for experimentation: Write an assembler. Handle errors, add your own instructions and make small programs with them. Try to enforce the register sizes or create “stack and add” subroutines. You could also try to create opcodes with different cycle length or implement a small pipeline (and then resolve stalls). Have fun with it!